Step 1. Click the Create button on Integration tab or access the link https://api.slack.com/apps?new_app=1 to create your slack app.
You will see the dialog below:


Choose "From an app manifest".
You will see the dialog below and select your team you are working on if you have more than 1 team.

Then click Next button.
Step 2. Add a new configure in Manifest
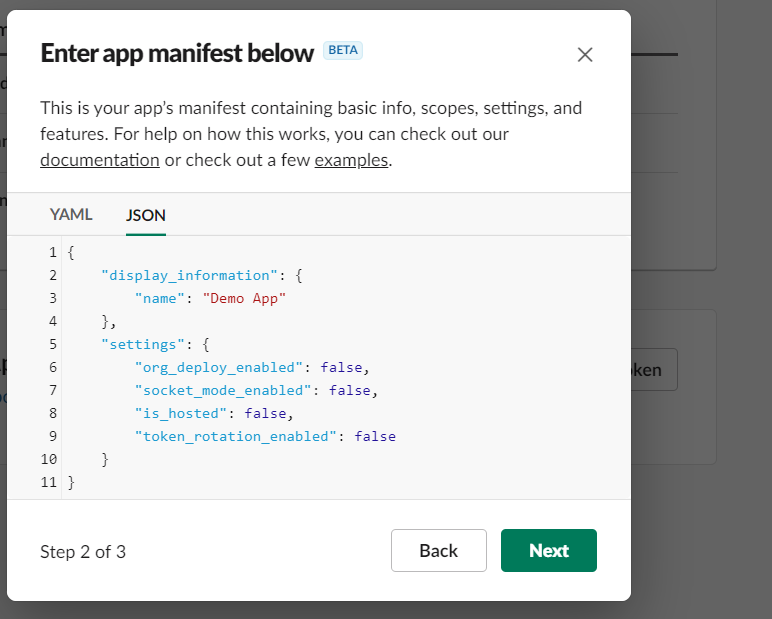
You will see the dialog. (suggesst using json)
Copy all text below
| Code Block |
|---|
{
    "display_information": {
        "name": "MySlackApi"
    },
    "features": {
        "app_home": {
            "home_tab_enabled": false,
            "messages_tab_enabled": true,
            "messages_tab_read_only_enabled": true
        },
        "bot_user": {
            "display_name": "BotName",
            "always_online": true
        }
    },
    "oauth_config": {
        "redirect_urls": [
            "http://localhost:2990/jira/secure/ConfigureCustomerSatisfactionSurvey.jspa?projectKey=***"
        ],
        "scopes": {
            "bot": [
                "app_mentions:read",
                "bookmarks:read",
                "bookmarks:write",
                "calls:read",
                "calls:write",
                "channels:history",
                "channels:join",
                "channels:manage",
                "channels:read",
                "chat:write",
                "chat:write.customize",
                "chat:write.public",
                "dnd:read",
                "commands",
                "conversations.connect:manage",
                "files:write",
                "groups:history",
                "conversations.connect:read",
                "conversations.connect:write",
                "emoji:read",
                "files:read",
                "im:write",
                "groups:read",
                "groups:write",
                "im:history",
                "incoming-webhook",
                "im:read",
                "links.embed:write",
                "links:write",
                "links:read",
                "mpim:history",
                "metadata.message:read",
                "mpim:read",
                "pins:write",
                "reminders:read",
                "reactions:write",
                "reminders:write",
                "mpim:write",
                "pins:read",
                "team.billing:read",
                "reactions:read",
                "team:read",
                "usergroups:read",
                "remote_files:read",
                "remote_files:share",
                "users:read",
                "remote_files:write",
                "team.preferences:read",
                "workflow.steps:execute",
                "users:write",
                "usergroups:write",
                "users.profile:read",
                "users:read.email"
            ]
        }
    },
    "settings": {
        "org_deploy_enabled": false,
        "socket_mode_enabled": false,
        "token_rotation_enabled": false
    }
} |
Paste into dialog manifest (tag json).
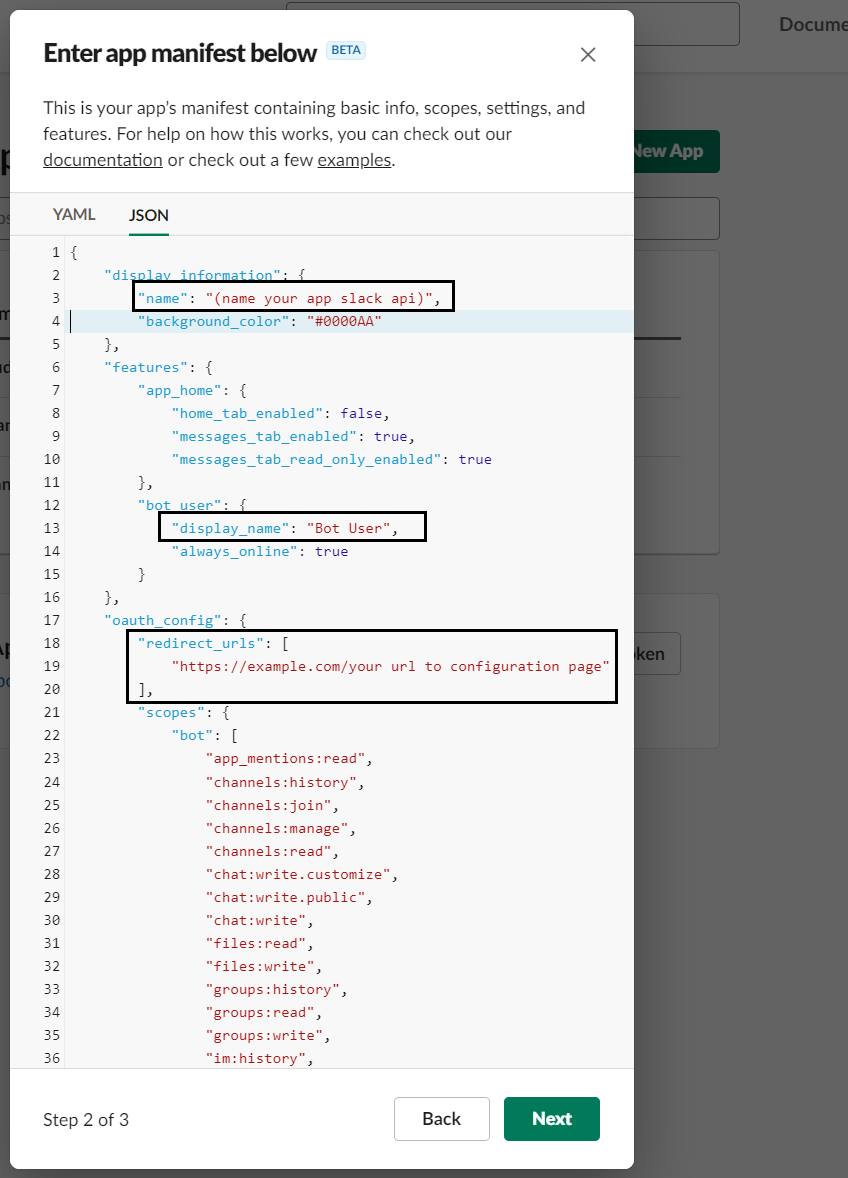
Change 3 param in your own way.
display_information:
name: ***
(For example, name: MySlackApi)
bot_user:
display_name: ***
(For example, display_name: BotName)
oauth_config:
redirect_urls: ***
(For example, the CSAT configuration page URL http://candylio.com/secure/ConfigureCustomerSatisfactionSurvey.jspa?projectKey=TEST for project with key is TEST)
Then click Next button.
Step 3. Review your configure Slack Api
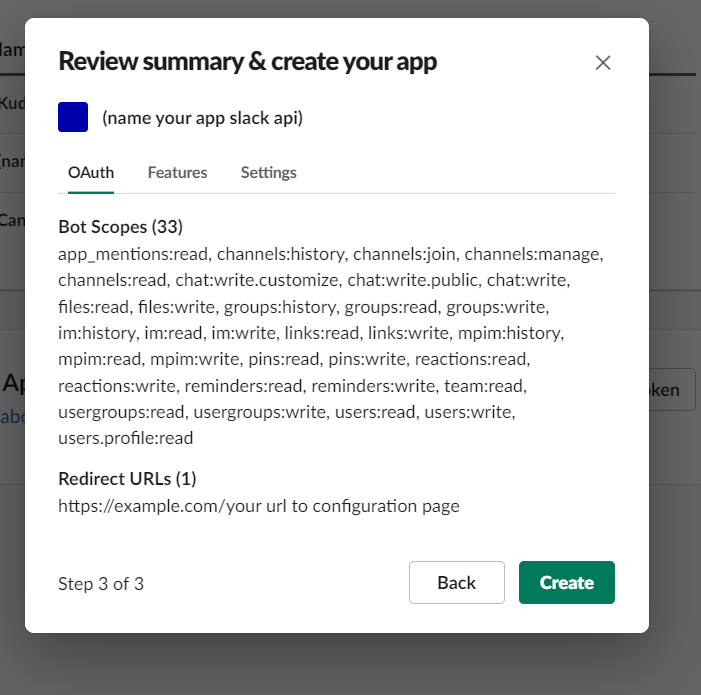
Then click Create button.
Step 4. Copy and paste the the Client ID and Client Secret to the CSAT Configuration page
From the Settings menu select Basic Information - Copy the Client ID AND Client Secret
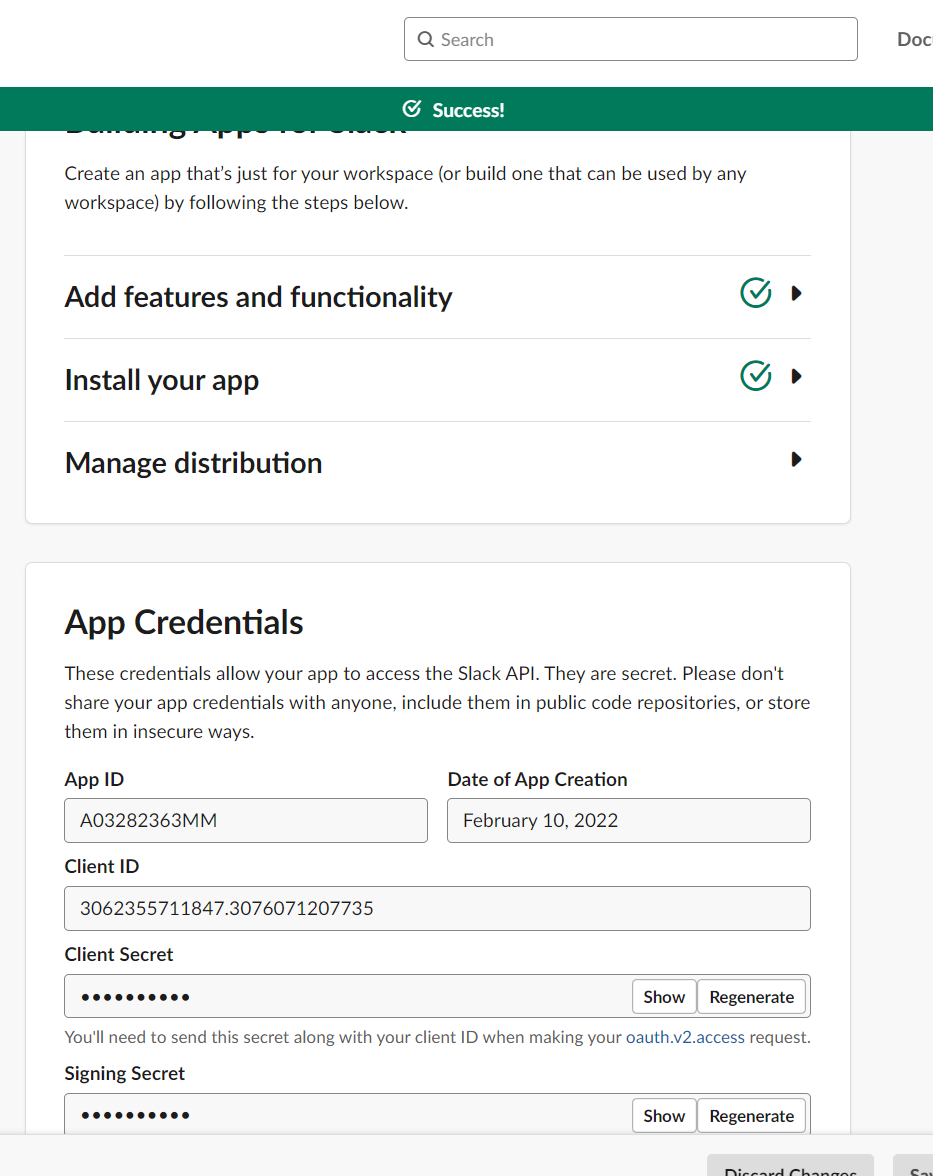
On the CSAT app configuration > Integration tab paste your Client ID AND Client Secret on the integration form
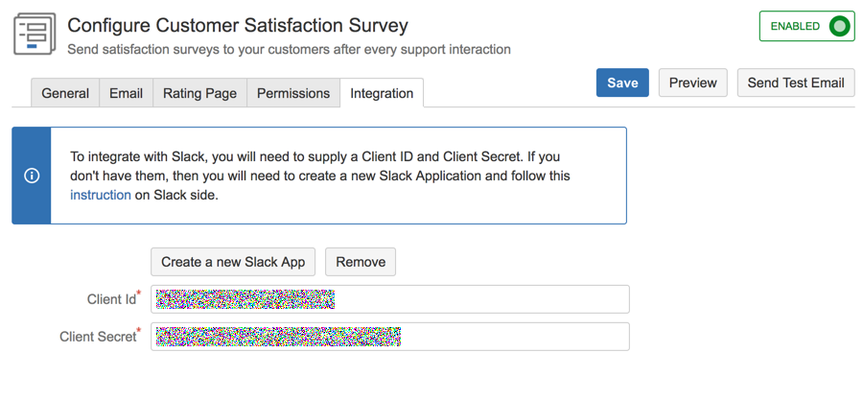
Then click Save button. An Add to Slack button will appear as below:
.png?version=1&modificationDate=1644568011089&cacheVersion=1&api=v2&width=544)
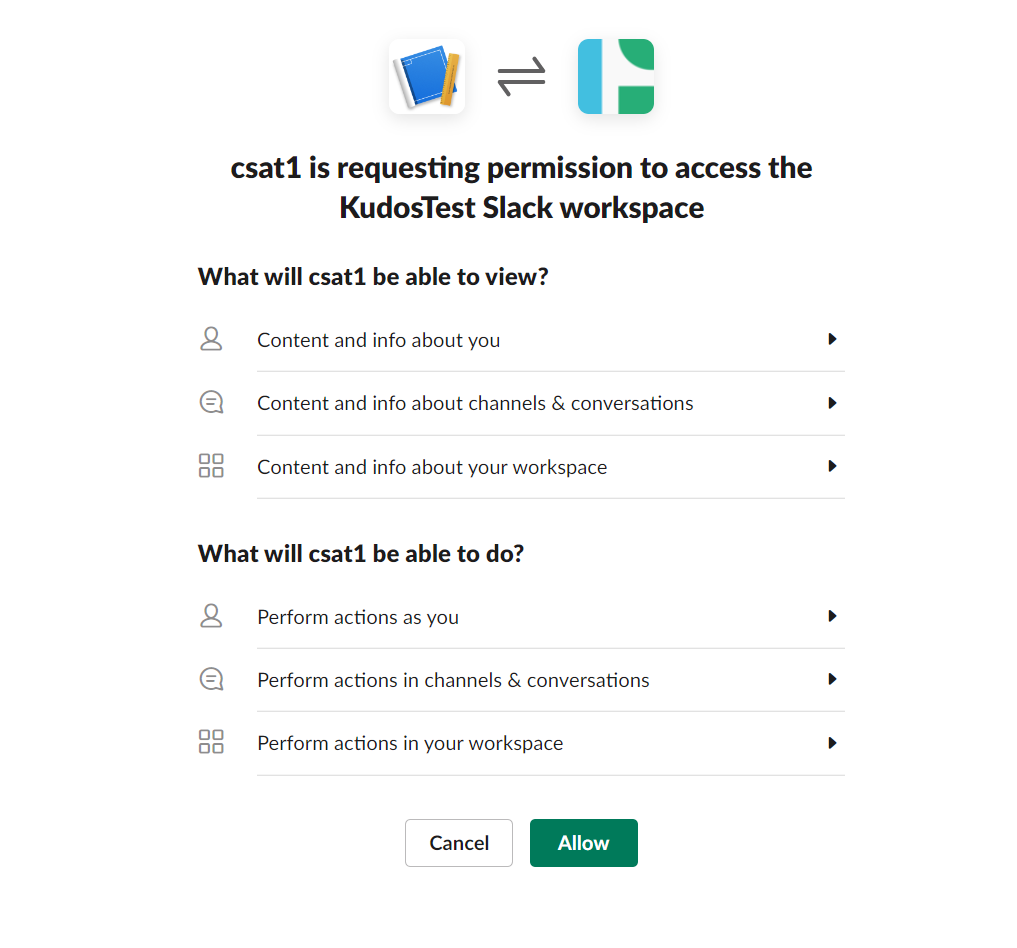
Then click Add to Slack button to authorize.
Click Allow button at the bottom of the page
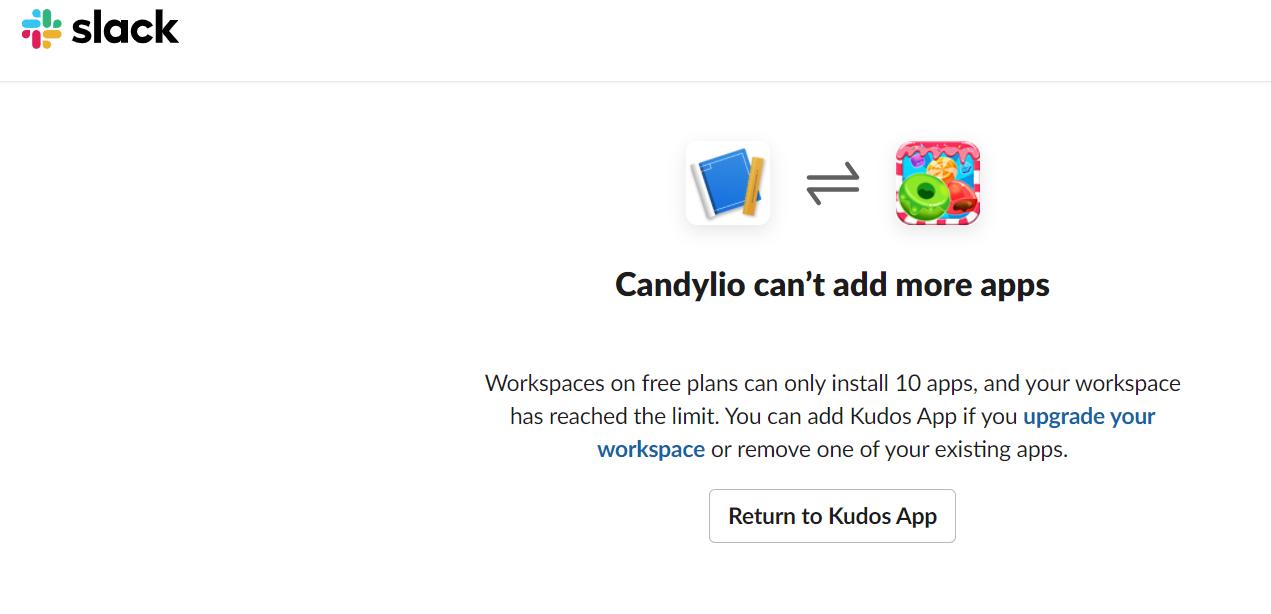
(Note: If you see this page, you need to upgrade your workspace or create new workspace in Slack)
You will be redirected back to the CSAT Configuration page
Step 5. Select the channel that you want notification messages to be sent to
A list of public/private Slack channels should be shown as below
.png?version=1&modificationDate=1644568218629&cacheVersion=1&api=v2)
Select a channel you want the notifications to be sent to. Then click Save button.
Congratulations! Now you can test your Slack notification by create an issue then rating.
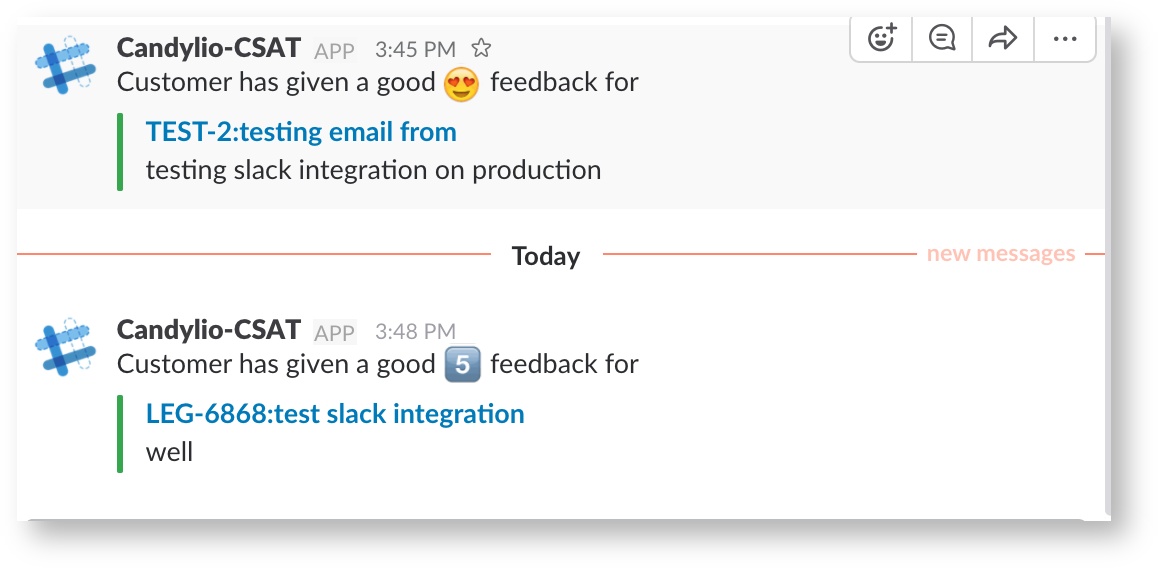
Public Channel:
The message in the corresponding Slack public channel will look like the following screenshot
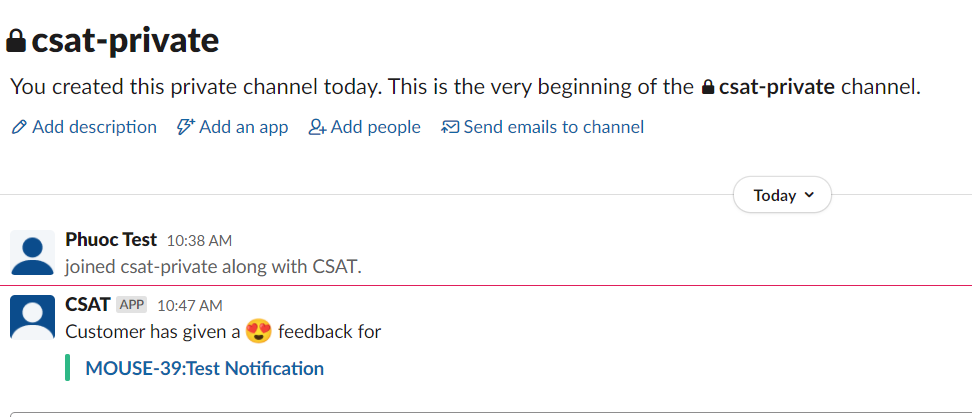
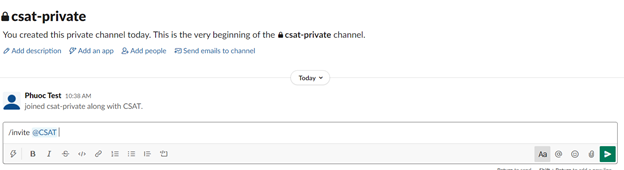
Private Channel:
Invite Bot User to private channel (choose Add an app or command line: /invite @BotUser)
The message in the corresponding Slack private channel will look like the following screenshot